

Connecting to marina power – have you got it right?
By Mark Smith
CEng, CMarEng, FIMarEST, BAppSc(MarEng)
Engineering Surveyor
Accredited Marine Surveyor: AMSA – 3242-6148 4
Qld EC lic. 73995
Based in Brisbane, Australia, Mark Smith is an AMSA Accredited Marine Surveyor, qualified electrician, and a Chartered Marine Engineer with over 40 years’ experience. Mark is a member of the Australasian Institute of Marine Surveyors, and Fellow of the Institute of Marine Engineering, Science and Technology (IMarEST). Mark is the owner of SET Maritime & Electrical, designer of the award-winning shore connection device – ESHORE.
I recently visited a local marina, and out of curiosity, conducted a quick spot check on the shore connections. I was amazed to discover over 85% of connections were unsafe!
It seems boaties are either unaware, or simply being complacent about their electrical safety. As the Master of your craft, you are responsible for the safety of your vessel and all who board it.
With potential hazards such as electrocution and fire looming, it prompted me to share the important things you need to know when you are connecting your boat up to power at the marina.
CHECK YA CABLES!
Size: The cable connecting your boat to shore power needs to be a certain size in order to safely conduct the electricity you need for your size of boat. A standard extension cord from Kmart or Bunnings isn’t going to do it guys! It’s required to be a minimum of 2 Core + Earth Orange (or Yellow) Circular cable (see below), with a recommended conductor size of 2.5mm2.

Shore Connection lead: Also you need to ensure that the cable connection from the service pillar to your boat is in good condition and that the plug and socket are the correct IP (ingress & protection) rating. The first digit is for ‘Intrusion Protection’ and the second ‘Moisture Protection.’ The minimum rating number of a vessel shore connection lead is IP56.
IP Reference Chart
| 1st Digit | Intrusion Protection | 2nd Digit | Moisture Protection |
| 0 | No protection. | 0 | No protection. |
| 1 | Protected against solid objects over 50mm, e.g. accidental touch by hands. | 1 | Protected against vertically falling drops of water, e.g. condensation. |
| 2 | Protected against solid objects over 12mm, e.g. fingers | 2 | Protected against direct sprays of water up to 15 degrees from the vertical. |
| 3 | Protected against solid objects over 2.5mm, e.g. tools and wires. | 3 | Protected against direct sprays of water up to 60 degrees from the vertical. |
| 4 | Protected against solid objects over 1mm, e.g. wires & nails. | 4 | Protected against water splashed from all directions, limited ingress permitted. |
| 5 | Protected against dust limited ingress, no harmful deposits. | 5 | Protected against low pressure jets of water from all directions, limited ingress permitted. |
| 6 | Totally protected against dust. | 6 | Protected against strong jets of water, e.g. on ships deck, limited ingress permitted. |
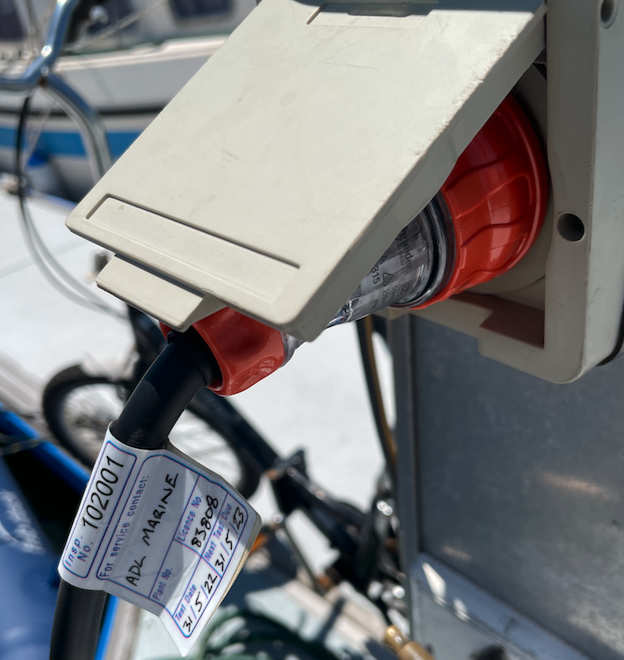
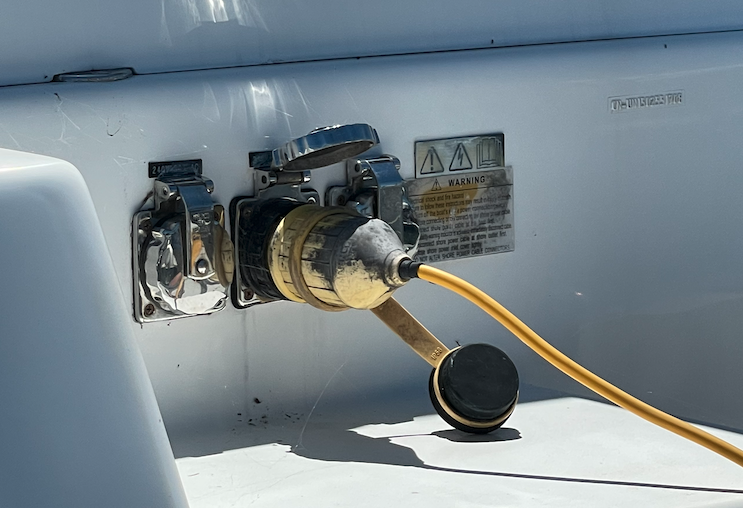
The below photo shows what a compliant shore connection the plug and socket looks like. The important feature to note is the threaded locking ring. When you have made the connection, you must screw up these locking rings – if left loose then the IP56 rating is lost. The IP rating would be IP33 at best.

Your electrical connection is not safe from water or dust if it doesn’t fit the plug properly. See examples of poor fit in the ‘examples’ below.
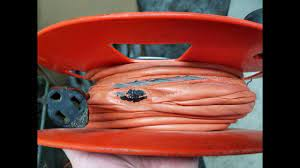
Cable Condition: This goes without saying – your cables need to be in good condition! Being subject to all kinds of weather, you need to check them regularly. If you notice they are starting to get brittle and cracking (like the one pictured below), it’s time to replace them.
Also the lead shall while it is coiled up should not be connected to the low-voltage electrical supply .
Also the lead is not to be coiled up when connected to the 240V electrical supply cable as it is a fire hazard. As electricity passing through the coiled lead creates resistance in the conductors creating magnetism. The electrical energy passes from the outer coil to the inner coil and in doing so the voltage reduces increasing heat which can melt the PVC insulation.
Test and tag: It’s a requirement that your cables must be tested and tagged (as per the example below) by an electrician or a competent person every 12 months.
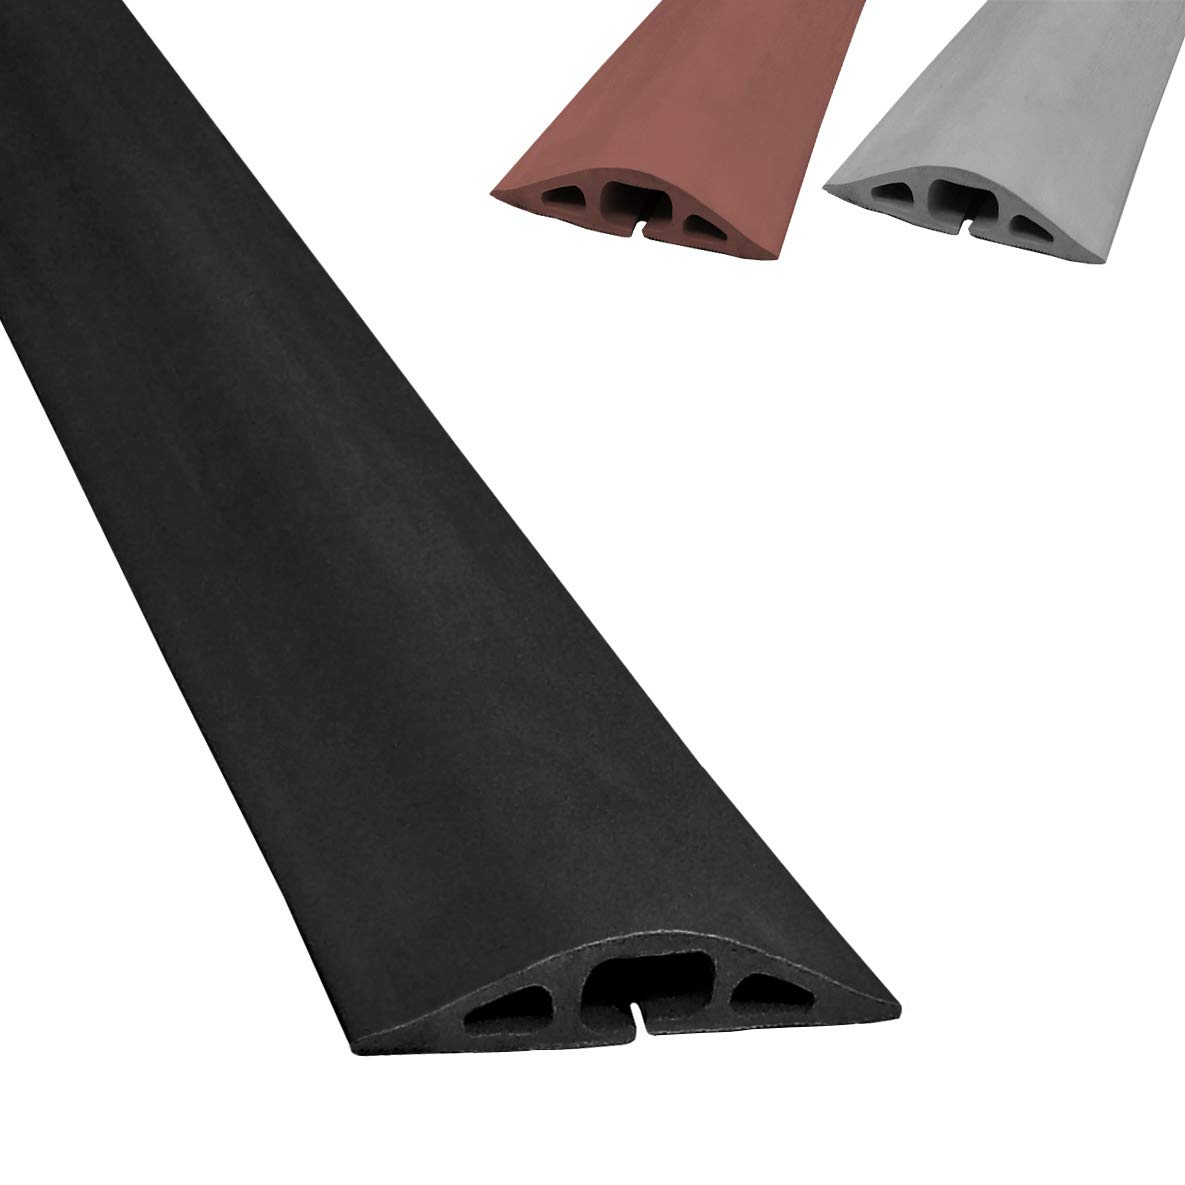
Location: Sometimes, you can’t always get pillar connection right next to your vessel. With safety in mind, your extension lead should be no greater than 25 m in length (for a store purchased lead) and follow the most direct route to your vessel. If the route has to cross walkways, it can be a trip hazard so use a Rubber Cable Protector to protect your shore connection lead and avoid an accident.
Ideally the connection point on your boat is best located undercover and sheltered from the weather. If this is not possible then the connection point IP rating from 56 should be increased to 66. That would require the inlet cover to be a screw type cover.
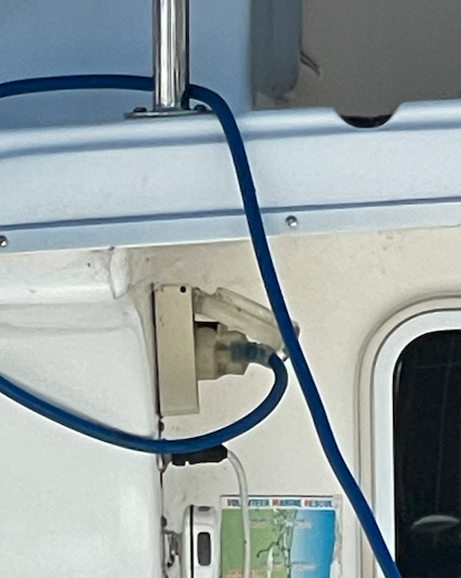
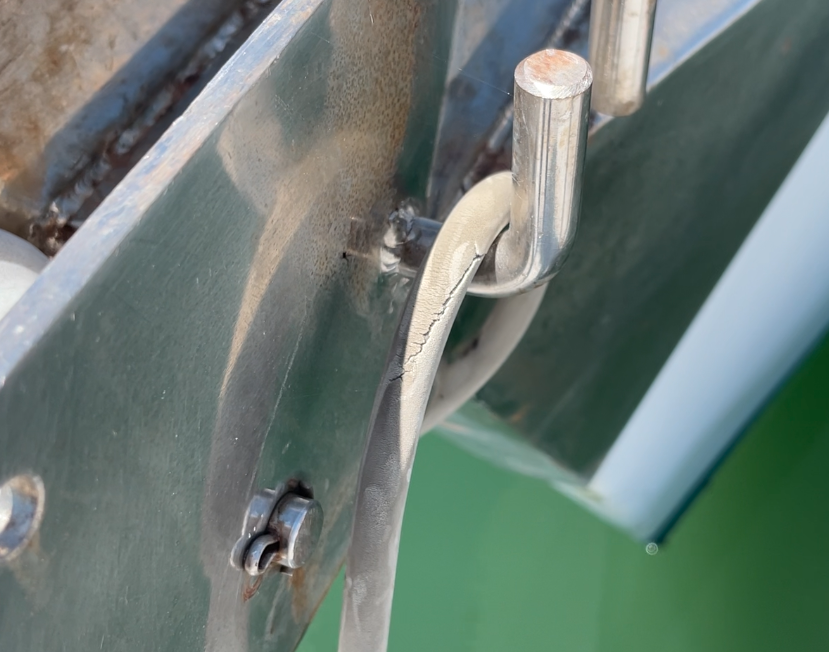
It’s not ideal for the lead to go through the hatch (see example below) because of the potential to damage the cable from the edges of the hatch. In the case of metal frame hatches, this can lead to conductor breakages causing high resistance joints. The generation of heat at this point can melt insulation and can cause short circuits, fire or electrocution.

Examples
| Correct | Not a chance! |
| Yes! Do this! |  This plug type has an IP rating of IP20, and the testing tag is well out of date. |
 Plug protects from weight of socket cover Plug protects from weight of socket cover | 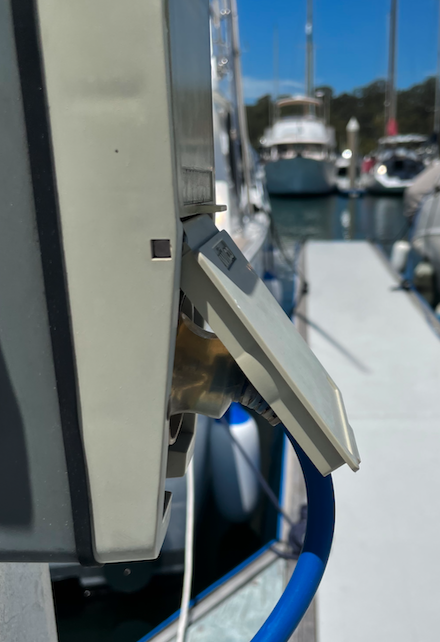 The weight of the socket cover is bending the cable and damaging the copper (copper is soft and bends easily). If you continually bend the lead, the copper structure hardens and becomes brittle. This will eventually break the conductor causing a high resistant joint. This will cause heat to be generated and could lead to a fire |
 A white extension cord is for indoor use only and suitable for light loads (TV, lamps, etc). The copper conductor size is 1.5mm2, where the minimum is 2.5mm2. | |
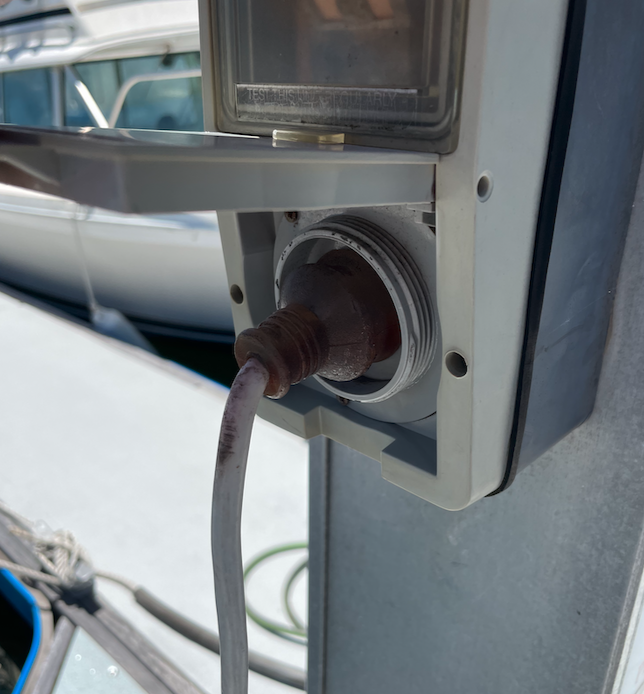
 Poor plug termination (apart from being IP20) with single insulated conductors are exposed and no gland nuts fitted. |
LOOK AFTER YOUR SHORE CONNECTION LEAD
Coil up shore connection lead by holding one end in your left hand and then with your right hand, wrap the cord the length of your forearm, tightly around your left elbow and then back through your left hand, as per the image below.

Winding the cable as below, with tight bends, twists the copper conductors. This will ultimately break the copper wire, causing a high resistance joint which may lead to the cable burning out or worse causing a fire.
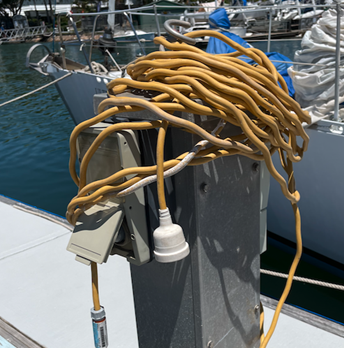
Have you seen something like the above as you walk down the Marina Pontoons to your pride and joy? Let’s hope it’s not the boat next to yours!
SHORE CONNECTION DEVICES
Now you’ve got your boat in your pen, you’ve connected up to shore connection at the pillar box with your IP56 shore connection lead, and you’ve now ready to turn the power on to supply your boat’s electrical system.
However, there is a further step to undertake. Under the electrical standards you need a device permanently installed on your boat that will check the polarity, check the continuity of earthing conductor, and if it’s all correct, it will let you connect to the power.
It’s important that you have one of these – not only for the safety aspects to protect you from electric shock, short circuits, and possible fire, but also it is mandatory in Queensland to have a device for your vessel. To be compliant with current electrical safety legislation and standards, your shore connection device must be able to check polarity. Read more here
The vessel’s wiring is correct for polarity when this is verified by a Certificate of Electrical Compliance and is issued by an Electrical Contractor. However, each time a connection is made, the polarity of shore connections are not clear to the vessel owner, due to unknown factors of installation, maintenance or interference. However, If the polarity of the power supply is reversed, this can render the vessel’s electrical safety devices ineffective.
The polarity testing is an important test and is a momentary test only, as you need to check the voltage between active (red) to earth and neutral (black) to earth. The devices on the market are monitoring polarity, that is the connection between active and neutral to earth are hard wired in. This will energise then the earth conductor and potential can electrically liven up all the metal casings of electrical appliances. Additionally, the Standard clearly states that current will not run normally in the earthing conductor and when the device is monitoring type for polarity, your SHORE CONNECTION DEVICE is not compliant.
The only device on the market that meets electrical safety legislation and standards, and has a momentary test for polarity is ESHORE. If the polarity is incorrect, ESHORE is equipped with a simple switch that you can reverse your polarity and connect your boat, even if the lead or the shore connection box from the marina is incorrect polarity. So it doesn’t leave you at a point where you can’t use your vessel in the harbour and keep your fridge going – and your beers cold!
Launched in May 2022, award-winning ESHORE’s unique and patented electrical design was created to ensure the safety of boat owners, to meet regulatory standards, and to save time and money on incorrect connections!
WHAT YOU NEED TO DO
- Don’t be complacent with your safety! Know what you need to do to stay safe on your boat – a little knowledge goes a long way to not only keeping you safe, but can save you a lot of money!
- Check you have the right size cable and right type of plug.
- Get an appropriately skilled person to test and tag your connection.
- Get ESHORE and get peace of mind you are doing everything you can to remain safe – and meet your compliance obligations (there are fines for non-compliance)!
- Check your connection regularly and diarise your annual test and tag check.